There are a ton of missions in the game Grey Hack and these tutorials can become pretty lengthy. There is a Grey Hack handbook I would suggest checking out as I have used it many times and I will link here.
Grey Hack is currently in v0.9.5647 If this tutorial doesn't work check the current game version and steam page for update history. This page is a work in progress, I will post my tutorials as time goes on. Hopefully I can figure out how to create a comment section to keep people posted and answer questions. Also note the due to the complexity of these missions there could possibly be more than one way to complete them, also note that the tutorial is to help you complete the mission, there could be better or worse ways to do this and I am not claiming that this way is the best way nor am I trying to complete the mission THE BEST, I'm just doing this for fun and to help you get mission success.
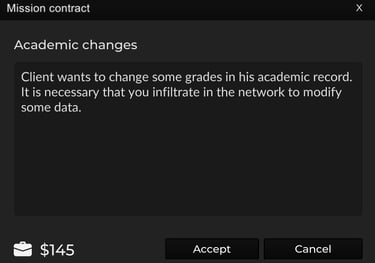

Mission: Academic Changes
Game Version: 0.9.5647
Mode: Multiplayer
Objective: Modify Karmen Tonoui's Programming grade to a passing score in the academic database at LAN address 192.168.8.2, accessed via remote IP 143.212.15.231.
Steps to Completion
Step 1: Scan the Target Network (nmap)
Identify open ports and services:
Run an nmap scan on IP address 143.212.15.231 to identify available services. Key results include:
PORT STATE SERVICE VERSION LAN
3306 open students 1.1.4 172.16.24.7
3307 open employees 1.1.4 172.16.24.7
25 open smtp 1.0.2 172.16.24.7
80 open http 1.6.3 172.16.24.7
3308 open students 1.1.4 192.168.8.2
3309 open employees 1.1.4 192.168.8.2
19267 open http 1.6.3 192.168.1.2
Step 2: Obtain an HTTP Exploit
From the nmap scan results we can see what ports are open, what version of the exploit is needed and the LAN. We will need to go to our Browser.exe (Go to the internet) and then connect to your hackshop. Once there you will need to click on EXPLOITS. There will be a drop down menu listing the exploits available. We will select http, then to the right there will be a versions input box for you to type in, in our case the version was 1.6.3. Because we need to connect to the shell (terminal) we need to find an exploit that gives us shell access, preferably with root access. We found a script that gives us guest access which is fine so we purchase the script and save it to our /bin folder. Be sure to check the requirements of the script to ensure that you meet the requirements.
Step 3: Verify Script Requirements & Execution
In our case the script required that a user be logged into the computer so to check if a user was logged in, we went back to our terminal typed in the name of our script (in our case it was sphinx5ph1n3, this could change) and pressed enter. I knew the script wouldn't work because we didn't input additional parameters, by pressing enter the terminal will tell you what is required in case you are ever confused. The output we received was the name of our script followed by IP address and port number, so I filled in the information like this below.
sphinx5ph1n3 143.212.15.231 80
This failed because there was no user logged into the computer; this is where things get tricky.
Step 4: Force User Login via SMTP Exploit
I went back to the hackshop and found a script to target smtp, I typed in the required version, in our case it was (1.0.2). I found a script that would allow use to exploit the vulnerabilities in smtp and allow us to change the password to a random user. then paid and downloaded this and saved it to my /bin. Next I went back to my terminal and typed in the name of the script + ip address + port and the output was success! I was then asked to type in a new password for the user Kierr which I just typed in hacker as the password but it's not necessarily needed because we have what we came for which was the name of a user (Kierr).
Step 5: Social Engineering Email
Use whois command in terminal to gather admin contact info and extract details like admin name, email, and organization. Send a spoofed email pretending to be Kierr, informing the admin of a login issue and requesting a system check. Wait for confirmation that they are logging in. Example Email below.
Hello Tobi Imzod
I'm Kierr, I work with you on www.nokeqobeg.org.
I have to finish some pending tasks remotely, but when I enter the credentials of my account, the system alerts me that someone has tried to enter into my account in an unauthorized way.
I am worred about possible theft of data, so as you are the administrator of the system I will let you know in case you have to check somewthing.
Thanks for your time.
Step 6: Exploit HTTP Service
You should get a response back if done correctly. Now, retry the exploit with the target IP and port (sphinx5ph1n3). BOOM! success, you now have guest shell access.
Step 7: Delete Logs and adjust the grade to complete mission.
Now that we have guest access in the shell we will type in FileExplorer.exe in the shell to pull up a user interface. Next we type in (sudo -u Kierr) this will then ask us to type in a password. If you remember we already set the password with a previous script and that password was hacker so we now type in hacker as the password. BOOM! We now move from guest access to user access (privilege escalation). Now that we have user access we need to go to the /var folder and double click on system.log to get rid of the evidence. Find in the system log where it says (shell obtained) and delete that log, do not delete all logs as you will leave behind another log when you excite, deleting your (shell obtained) log is all that is required as of this patch. If you are unable to do this because you do not have the right privileges then you will need to gain root access (I didn't have to do this but you might). To complete this, in your user interface find the /etc folder and there should be a passwd file. Open this file and you should see something like (root: 8dc711c4f272d1758d1dd418110ff8b4) and you might see more but we just need root for this. Copy and past all of the information in that file to a file on your desktop using the Notepad application on the Desktop, name it password.txt for ease of use. Next open up the terminal and move to the correct directory by typing in (cd Desktop) You should now be in your Desktop directory via your terminal. Once there you need to decipher the root password encryption, and we will do this by using the decipher tool we got from hackshop (That's where you get it if you don't have it). Now in your terminal type in (decipher password.txt) and press enter. It may prompt you to type in a number to select what user you want to decipher, this may take a little bit of time if you don't have a graphics card. Select (1) to decipher the root encryption. The output of this will be listed in your terminal and it will say password: xxxxx (below is the output that I received)
xxxx@xxxxx:~/Desktop$ decipher password.txt
Multiple users found.
1: root:8dc711c4f272d1758d1dd418110ff8b4
2: Numbe:6c63212ab48e8401eaf6b59b95d816a9
3: Kierr:d6a6bc0db10694a2d90e3a69648f3a03
Select user: 1
[###################################]==[ 100% ]
Selected user: root
Deciphering...
password found! => yount
We now have the password to root.
Step 8: Gain Root Access
Go back to the terminal where you have Kierr access and type in (sudo -s) in the terminal. This will tell the computer we want to change to root. It will then ask you for a password, the one we just got from our decipher tool so type that in (yount), BOOM! We now have root access to the box. Time to erase our evidence. Type in FileExplorer.exe to open up the user interface and move to the /var directory and open up System.logs find where it says shell obtained and delete that log. Next go find the StudentsViewer.exe in the user interface and double click it to open up the portion where the students are displayed.
Step 9: Find the name of our student, change grade, respond with (done) to our mission email.
Once the students information is pulled up click the arrows to find the student you need to change grade for, in our case it was Karmen Tonoui. Click the pencil / edit button next to the grade that needs changed, I usually just change it to 9.0. After this click save in the upper left-hand corner, you will then get a notification in the top right of your screen telling you this was a success. Before exiting out go to your email where you received the mission and respond with (done) and ensure you get a response back saying that the client is happy and you have received an income to your bank account. Once you have received the money you are free to exit the windows and go back to your main Desktop, or you could keep browsing the files to find other information.
Mission Complete!
You’ve successfully infiltrated the system, modified the grade, and erased logs to cover your tracks.
I hope this tutorial was helpful, please follow me on X here and check back for more tutorials.